
When I first got the urge to ferment food I was entirely terrified. The idea of bacteria developing on something sitting at room temperature for long periods of time sounded like a good way to end up sick, not like something that would benefit my gut health. Boy oh boy was I wrong! Homemade fermented hot sauce is only one of many ferments sitting in my kitchen now.

My husband and I have always been hot sauce connoisseurs. Who could blame us? There seems to be an endless amount of hot sauce flavors in this world. These flavors were largely defined by the local peppers grown unique to each region:
American South Louisiana Style: A thin, bright red sauce often made with aged peppers, vinegar, and salt. Tabasco is a prime example of this style of what American’s would consider a regular hot sauce.
Mexican Style: Often uses a variety of chilies like piquín and arbol, giving the hot sauce a rich smoky or dried pepper flavor, focusing more on deep Chile notes rather than excessive heat.
American Southwest: Features thick-walled New Mexican peppers with a focus on “red” or “green” chili sauces that are often served fresh or with minimal vinegar.
Asian Style: This style often involves unique flavors from fermentation, resulting in a different kind of umami complexity. Often combined with bright and sweet ingredients such as lemongrass, sweet peppers, ginger, garlic and rice vinegar.
The Benefits of Fermented Foods
Fermentation is nothing new, however it seems to be growing in popularity amongst the Americana culture – especially the homesteaders and those concerned about general health when considering diet.
Fermentation is the natural process of suppressing bad bacteria while creating an environment that is suitable for good bacteria to grow. In this growth, different yeasts and bacteria multiple and create a fermented food that ultimately benefits the health of those who consume it. This natural process is unique because it cannot be duplicated perfectly within a scientific or lab setting.
One google search of “benefits of consuming fermented foods” will not only push you into a rabbit hole, but likely leave you hungry to learn more. There are certainly more pros than there are possible cons.
Improved Gut Health: The beneficial bacteria (probiotics) enhance your gut microbiome diversity. Probiotics help improve digestion and protect against gastrointestinal disorders by reducing inflammation and boosting the immune system.
Enhanced Nutrient Absorption: The process of fermentation breaks down complex carbohydrates and proteins into simpler forms, making them easier to digest and absorb. Fermentation also enhances the bioavailability of vitamins and minerals found in different foods.
Weight Management: Fermented foods may produce a feeling of fullness and reduce caloric intake, potentially aiding in weight loss.
Antioxidant and Anti-Inflammatory Properties: The process of fermentation creates beneficial antioxidants and anti-inflammatory compounds such as beneficial lactic acid bacteria and acetic acid. These substances protect against oxidative stress and may reduce inflammation in the body.

Hot Pepper Varieties
Choosing what peppers to buy, or perhaps grow yourself this garden season, can feel like a big decision you don’t want to mess up. I get it! There’s an endless amount of fresh peppers to explore.
I recommend buying what brings you joy. As a gardener, my biggest encouragement is for people to grow what attracts them to the garden. I truly believe it’s what keeps gardeners doing what they love most — gardening.
Could you imagine growing food that brought you no joy? What a nightmare!
This year, we grew familiar peppers, as well as new varieties we’d never heard of before. Some grew very well, while others didn’t have a chance. For this very purpose I always start more seeds than I intend on growing. You can always give them away or feed them to the chickens.
In our pepper garden this year we grew Jalapeños, Early Jalapeños, Banana Peppers, Brazilian Sea Stars, Goats Horn, Habanero, Anaheim Peppers and California Wonder Bell Peppers.
If you’re not looking for an incredibly spicy hot sauce ferment (like one with ghost peppers and scotch bonnets) give the following fresh peppers from a local grocery store a try: Banana Peppers, Anaheim Peppers, Poblano Peppers or Sweet Italian Peppers.
Step by Step Guide to Fermenting Peppers
This recipe is a two-step process. It cannot be completed in one sitting because fermentation is included, which takes several weeks. This homemade fermented hot sauce recipe takes no longer than 30 minutes to prep (depending on how fast you are with a knife and handfuls of hot peppers – wear gloves!).
Let’s begin!

How to Ferment Hot Peppers
Fermenting hot peppers with the goal of creating hot sauce is quite simple. You can make these flavors enhanced and unique by incorporating specific hot peppers, as well as other produce from your garlic such as garlic or lemon grass. That’s the best part about it! Your hot sauce ferment is individually cultivated by you for a flavor profile unmatched by anyone else.
Step 1: Collect Peppers
I’m not going to tell you what peppers to collect. This will be solely your decision. Gather roughly 2lbs of peppers. Hot peppers will create a more spicy, intense heat. This heat can be diluted with vinegar and sugar – just like we are doing!
Step 2: Prepare Peppers

Rinse the peppers under cool water. Slice the peppers in half and discard the seeds (optional – leaving the seeds will produce more heat). Cut the peppers so they are no smaller than 1 inch and no larger than 2 inches. Place them all into a large bowl.
Step 3: Weigh and Add Salt
Using a kitchen scale, place a clear quart sized glass jar (I prefer to use a mason jar) on the scale and zero out the weight. Add peppers until there’s only 1 inch headspace in the jar. Calculate 4% of the weight of your peppers in the jar (remember, this does not include the jar weight). Add your equated number in salt to the jar.
Example: If your jar with added peppers (not including the jar weight) is 200g, you would add 8g of salt (4% of 200).
Step 4: Add Water
Once you add the peppers and salt, it’s time to add the water – this will naturally create a salt water brine. It’s crucial you don’t use tap water because it includes elements purposed for killing off bacteria – the opposite of what we want. I recommend using any sort of filtered or purified water. Add the water until there is about 1″ headspace in the jar.
Step 5: Add Weight

Four week old pepper ferment with “safe” bacteria formed on the surface. Fermentation has to happen in an anaerobic environment. Exposure to oxygen increases the chances of bad bacteria rapidly developing. Using a glass weight will keep the peppers below the water surface as long as the weight remains at the top.
If you don’t have enough peppers in the jar your weight will begin to sink over time and peppers will float to the surface. If this happens gently push them below the weight again and adjust as needed. If you need to add filler items, you can. Just be sure they’re sanitized.
If peppers float to the top and have developed a fuzz to them, just scoop them off. It isn’t uncommon to see something like Kahm Yeast in a ferment, but I personally avoid all mold growth that has developed on my food during a fermentation process. It’s just not worth the risk to me!
Step 6: Cover and Rest
The last step is to cover the ferment with a cheese cloth or thin towel, or a fermenting lid if you have one. These lids are worth their weight in gold! They keep oxygen out while allowing gas to escape when needed.
If you’re using a towel, use a rubber band or canning ring to keep it tight in order to keep pests (like fruit flies) out of the ferment. Let the peppers sit in a cool, dry area out of direct sunlight for at least 4 weeks. The longer you allow it to ferment, the stronger the fermented flavor. A longer fermentation time will increase the chance of bad bacteria growing.
Results

The fermentation process can feel daunting and nerve-wracking, but have no fear! Fermentation is a natural process our ancestors have been using for generations and generations before us. This is not a new concept. Fermenting foods is another skill to learn and expands your kitchen skills!
The History of Fermented Hot Sauce
Fermentation is no new process. It’s been a way of preserving food for generations. Our ancestors didn’t have the same luxuries we have today with electricity and the capacity to store or conveniently preserve food. Fermented hot sauce didn’t really become a “normal” thing until the early 1800s.
Evidence throughout history argues that there’s a chance fermented hot sauce is much older than our American history records. The Aztecs are accredited to being the oldest inventors of hot sauce, aging this delicious kitchen ingredient to 7000 BC. They didn’t ferment the hot sauce, but simply mashed up chili peppers and combined them with water.
It wasn’t until 1807 that hot sauce took off in the American history books. As the American Revolution raged on, the Cayenne Hot Sauce made headlines in a Massachusetts newspaper. In 1848 American soldiers returned home from the Mexican-American war with a new found love for hot peppers and pockets full of seeds to germinate.
In 1850 Edmund MchIlhenny secured the first-ever patent for hot pepper sauce. This marker in time is when hot sauce became a commercialized competition all over the world. It was Edmund that incorporated fermented hot peppers mixed with vinegar when he was living in Louisiana. Nowadays we call traditional recipes incorporating vinegar “Louisiana Style” thanks to Edmund!
Edmund’s history with hot sauce is quite beautiful. The post-war diet was bland and lacking in flavor, making his Tabasco sauce a special “treat” for that era, introducing many to new heat levels! It’s now the cornerstone of American hot sauces, but especially the fermented kind.
Turning Fermented Peppers into Hot Sauce
After weeks of allowing hot peppers to sit in their brine solution in a cool, dry place it’s time to turn the ferment into hot sauce! The recipe you’re going to read here is unique in style and flavor. Originally hot sauce is mixed with either water or vinegar. This recipe incorporates vinegar and a sugar brine (hence the “cowboy candy” part of the title).
Cowboy Candy Brine
Cowboy Candy is one of our favorite pantry foods! It’s one pepper harvest my husband often asks about come September. Cowboy Candy is just a fancy name for candied jalapeños. We candy more than jalapeños at this point, but the original pepper was jalapeños.
This brine solution could be used to candy jalapeños, but we will be using it to flavor our fermented hot sauce. It’s sweet, zesty and addicting!

Do I Need to Pasteurize Fermented Hot Sauce?
You might be wondering what is the shelf life of this hot sauce? Is this recipe shelf stable? The answer is… yes and no.
It completely depends on your preference. Because this recipe includes fermentation, one of two steps needs to be taken: pasteurize or refrigerate. To stop fermentation, carefully lower the pH level to below 4.6 or create an “unfriendly” environment for fermentation to continue.
Option 1: Pasteurize fermented hot sauce
Heating the fermented hot sauce on the stove to 180°F for at least 10 minutes will stop the fermentation process. However, heating the fermented hot sauce will also kill any live probiotics.
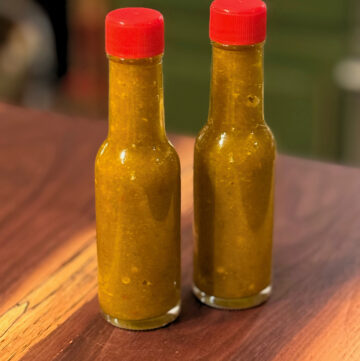
This process can be done before or after adding the cowboy candy brine. It can also be done after bottling depending on how you decide to bottle your hot sauce. I like to use these 5oz glass bottles purchased through Amazon. They also include dripper inserts and shrink capsules! The professional look makes them great for sharing with friends and family.
Option 2: Slow fermentation with refrigeration
If you would like to avoid pasteurizing your fermented hot sauce, the other option is to store it in a cold area, preferably the refrigerator. Fermentation will continue at an incredibly slow rate when stored in a fridge, as do all ferments. It’s one way to maintain the flavor of a ferment while reaping the benefits of the natural process.
Storing a ferment at room temperature will promote the continuation of fermentation. If the item is bottle and does not have access to release carbon dioxide gas, you run the risk of it exploding. Storing your fermented hot sauce in a refrigerator drastically slows the fermentation process.
Cowboy Candy Fermented Hot Sauce
Equipment
- 2 Glass Quart Jars
- 2 Cheese Cloths or Fermenting Lids + Rings
- Glass Fermentation Weight
- Kitchen Scale
- Large Mixing Bowl
- Small Mixing Bowl
- Cutting Board + Knife
- Medium Sauce Pan + Mixing Spoon
- Food Processor or Blender
- Strainer or Cheese Cloth
- Liquid Measuring Glass
Ingredients
Fermentation Brine
- 2 lbs Hot Peppers
- Salt (not iodized)
- Filtered Water
Cowboy Candy Brine
- 1 cup White Sugar
- 1/2 cup Brown Sugar
- 3/4 cup White Vinegar (or Apple Cider Vinegar)
- 1 tsp Garlic Powder
- 1/2 tsp Turmeric Powder
- 1/2 tsp Mustard Powder
- 1/4 tsp Salt (not iodized)
Instructions
Hot Pepper Fermentation
- Sanitize your work surface, as well as the glass jars and utensils you will be using. Fermentation requires a clean, bacteria-free surface. Avoid touching excessive kitchen appliances and handles during this process.
- Harvest 2lbs of Hot Peppers. Remove the seeds (or keep them if you want a spicier result) and discard them. Cut the peppers into pieces no smaller than 1 inch and no larger than 2 inches. Place them into a large mixing bowl.
- Place one of your 2 Glass Quart Jars on the kitchen scale, ensuring the unit is in grams, and zero out the scale. Fill the jar with cut peppers until there's 1" to 1/2" headspace at the top.
- Add 4% of salt (instructions to determine 4% in Step by Step guide above) to the jar filled with peppers. Then incorporate Filtered Water until there's 1" headspace left.
- Using a wooden or plastic Mixing Spoon, release any air pockets stuck in the jar. Place the Glass Fermentation Weight gently on top of the mixture, ensuring it remains at the top. If it begins to sink, and food floats to the top, you need to add more peppers.
- Top the jar with a Cheesecloth and Canning Ring, or a Fermentation Lid. This will ensure no pests can get into the ferment and keep the atmosphere free of undesirable bacteria. Place it in a dark, dry place for 4 weeks.
- Check your ferment every few days to ensure there isn't bad bacteria developing. If you see a tan or yellow film on top, it's likely Kahm Yeast and can simply be scraped off to preserve the flavor and look of the ferment. Green, black or purple molds indicate your ferment went bad and it should be discarded. A terribly unpleasant scent is also indicative of a bad ferment.
Hot Pepper Blend
- Once your peppers have fermented for a minimum of 4 weeks it's time to begin the hot sauce portion.
- Separate your peppers from the fermented pepper brine. Place the peppers into a food processor or blender. Keep the brine in a bowl for future use.
- Once all of the peppers are in the food processor, add 1 to 2 cups of brine and pulse. You should have somewhere between 6-8 cups of blended peppers at this point. Reserve adding any more brine until the cowboy candy mixture is incorporated.
Cowboy Candy Brine
- In a medium sauce pan combine 1 cups White Sugar, 1/2 cup Brown Sugar, 3/4 cup White Vinegar, 1 tsp Garlic Powder, 1/2 tsp Turmeric Powder, 1/2 tsp Mustard Powder, 1/4 tsp Salt and bring it to a boil. Once boiling, lower the heat and simmer for 10 minutes. Watch carefully and stir often to avoid bubbling over. Turn off the heat and allow to cool for 5 minutes.
- Add 1 cup of cowboy candy brine to the blended fermented hot pepper mixture and pulse to combine. At this point, you will need to add more to achieve your desired flavor and texture.
- Optional: If you prefer a Louisiana style hot sauce that is smooth and without clumps, filter the hot sauce through a cheese cloth. This can be done before or after you add the cowboy candy brine.
- Once you achieve your desired flavor and texture it's time to store your hot sauce. There are two options: (1) Boil the bottled hot sauce for 10 minutes or (2) store in the refrigerator. Both options stop or slow fermentation, making it safe to store and enjoy for months.
This fermented hot sauce is sure to be the star of the show at your next meal! Hot sauce brought life to the post-war American diet in the 1800s and it is still bringing life to recipes, appetizers and snacks today. Here are a few of my favorite ways to incorporate hot sauce into meals:
- Top with breakfast egg scramble, omelets or bakes.
- Incorporate into your next cheese dip for an extra spicy bite!
- Garnish your shepherds pie with some hot sauce to bring out the flavors.
- Dip your favorite lunch wrap into this deliciously, sweet hot sauce!
- Add a dash to your soup during the cold season to bring out the heat.
If you enjoyed this recipe please leave a review below and share how you incorporated your hot sauce into your diet! Don’t miss some of our other favorite recipes below.
- Quick Sourdough Discard Pizza Recipe
- My Sourdough Starter Went Bad! How To Keep It Alive
- One-Pot Cheeseburger Pasta Recipe
- Oregano Infused Olive Oil Recipe
Much love,
Courtney
Leave a Reply